This section is a work in progress. I have posted details as they are developed and will finalize with pictures shortly
Parking brakes are kind of important, in my opinion. The drive into my shop has about a 25% grade and I often park my vehicles on this slope. Having neutral safety switches on the transmissions, starting can become a real juggling act if the parking brake doesn’t work.
I have yet to meet an RCR GT40 builder who has made the factory brake work on any slope at all. The design uses a Hurst Airheart-style mechanical caliper, which was commonly used on 60s-era go-karts. The short parking brake lever and small Airheart caliper combine to generate enough clamp force to hold the car on about a 5% grade, if that. Under the best conditions, you can expect it to keep the car from rolling in the garage, but not on any slope. The solution is to increase the clamping force.
The design of a GT40 rear suspension makes this very complicated as the coil-over spring is just ahead and very close to the upright. Combined with the upper and lower radius links, it gets very tight to fit in a caliper. Some guys have gone to an electric parking brake however the bulk of it makes it difficult to fit into the space. There seem to be only three options at this writing:
- Brembo parking brake as used on a Tesla or similar vehicle
- Wilwood Electric Parking Brake
- Hi-Spec Electric Parking Brake
They all face the same issues: they are too large to fit ahead of the axle and clear the spring and the system becomes very pricey. Moving the main caliper to the front is easy on the RCR components by changing how the pieces bolt together. However, it also has space issues as the inlet fitting and suspension spring try to occupy the same space.
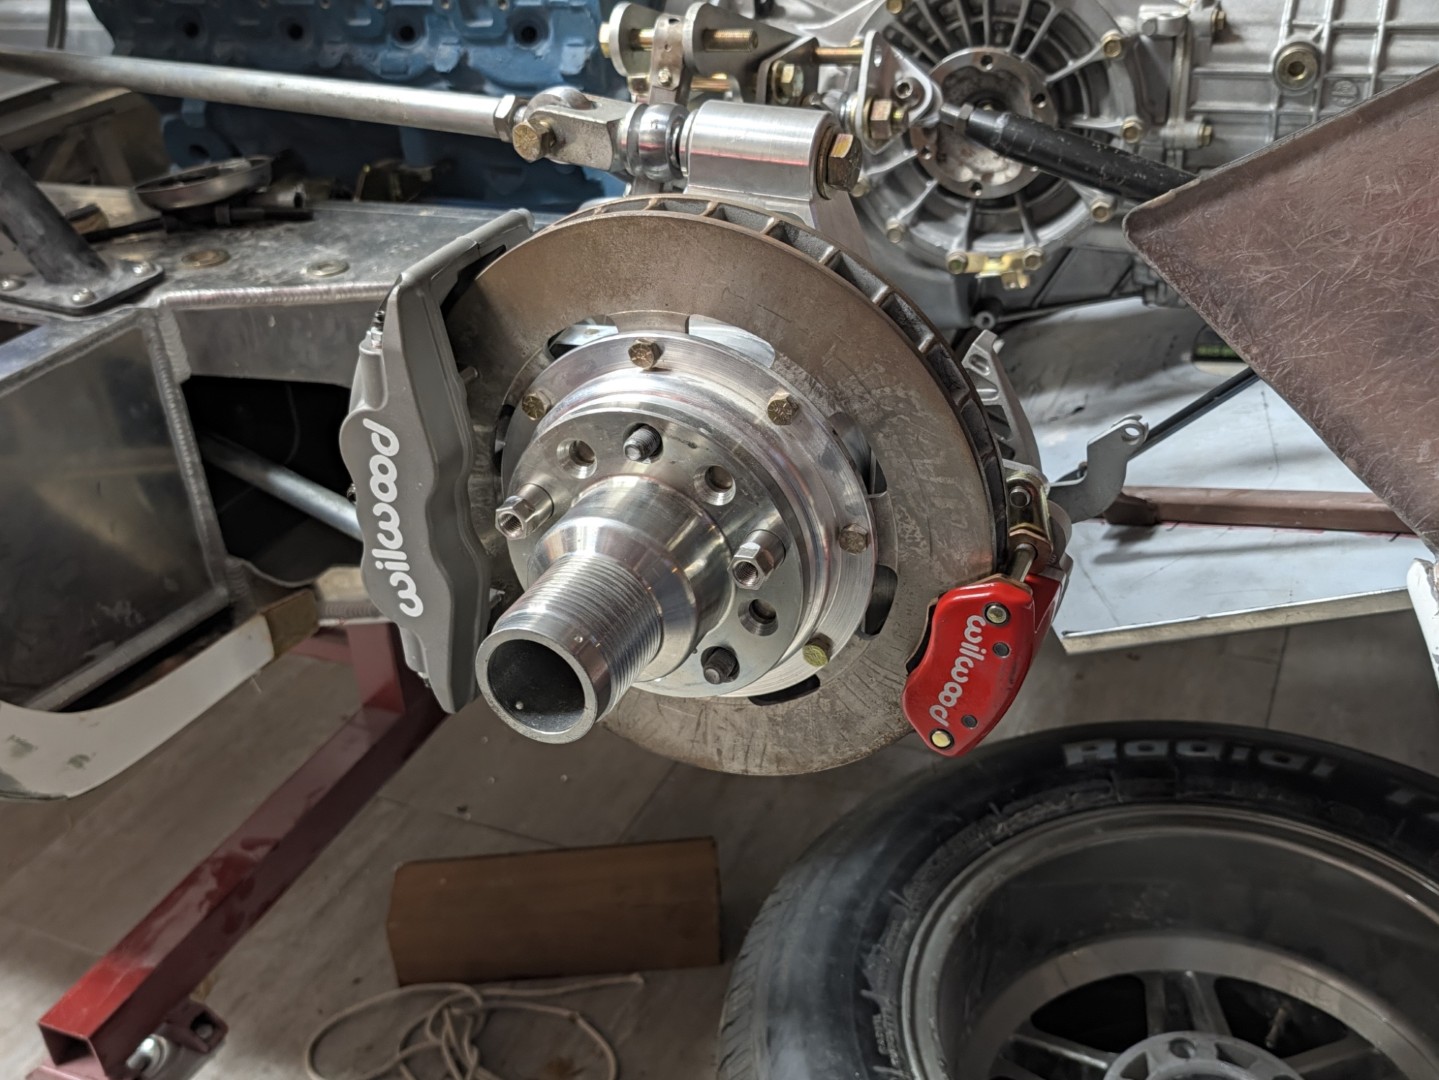
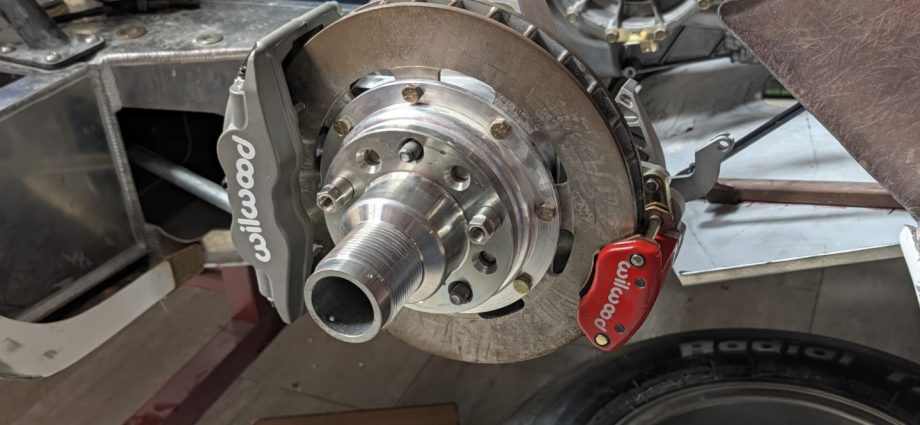
My build uses the 2″ flares and 15″ x 10″ wheels. I am familiar with the Wilwood MC4 mechanical parking brake, having adapted it to the 15″ wheel & IRS setup on my Cobra. I chose to fit the MC4 caliper to the RCR setup.
On the other end of the cables is the parking brake lever. There isn’t much room in a GT40 cockpit. The original under-dash lever style wasn’t an option; the modifications needed to mount it and resist the related forces ruled it out. The pull style used on some original GT40s and early Mustangs faced the same mounting issues. A longer lever wouldn’t fit. I decided to use an electric actuator buried inside the console that covered the vehicle’s spline.
On the Cobra forums are numerous articles about using the E-Stopp actuator. I liked the concept however its size was much too large for the GT40. A little more research and I found a guy who had developed his own using the small 12v linear actuator.
Relocating the caliper
Mounting the caliper at the front of the upright on an RCR suspension is relatively easy. Unbolt the mounting bracket, rotate it 180 °, and reassemble. Done, except now the inlet port and elbow are very close to the spring. The caliper has a boss cast into the body that raises the port about 1/4″. I’ve machined 1/8″ off it and retapped the 1/8″ NPT thread. I filled the port with packing to keep chips out of the system as this was done. Cycling the suspension, I found that in the closest position, the hose fitting was 1/4″ away from the spring. On a GT40, you quickly learn it is all about how tightly you can fit things together.
Mounting the parking brake caliper
The RCR parking brake is mounted to the rear upright by drilling and tapping for the supplied mounting bracket. I fabricated a mounting bracket for the MC4 using aluminum angle and drilled and tapped the upright to mount it. All fairly easy. The cable mounting casting and operating lever can be clocked to get it into the correct position. The assembly was rotated 15º to put the cable in the best possible position.
Operating cables
Specific cable fittings are used for the Wilwood MC4. It is important to minimize friction as much as possible. You want the forces being applied to the lever, not into friction in the cable housing. I clamped the cable to the top of the upright and ran it similarly to what is shown for the RCR setup
Passing through the bulkhead, they are spaced 1-1/2″ apart, centered over the spline. I chose to fabricate a mounting bracket for them and the actuator rather than mount them to the bulkhead. The bulkhead is angled and would induce a friction point when the inner cables pulled on the angled housings.
Actuator and bracket
I used a 12v linear actuator with a 2″ stroke. Studying it’s specifications, I learned it worked more efficiently pushing rather than pulling. That also allowed for a more compact design. A couple hours in front of my 3D CAD program and I had developed a mounting bracket to accept the cables, actuator, adjustment and mounting.
Electrical system and operation
Lorem ipsum dolor sit amet, consectetur adipiscing elit. Ut elit tellus, luctus nec ullamcorper mattis, pulvinar dapibus leo.