Block Prep
Take one FE block, add a lot of loving care, a little tweaking and voila, it’s a 428
I started with a 68 406 motor. Some of the minor parts are re-useable, but for all intent and purposes, I was after the block. The same could be done with a 390 or almost any FE. The date code on the block (located under the oil filter boss, cast into the block) indicates a 16 March 1968 casting date. (8C16). Later vintage blocks use a three bolt motor mount. Provides just a little bit more stability.

Decoding a Ford date code is relatively simple. The first number is the year of the decade, ie, 8 indicates 1968. If the number has a couple small dots under it, that indicates the Seventies, not the 60’s.
Next alpha character indicates the month, A = January, B = February, C = March, etc.
Last characters are the day of the month. Clear as mud, huh.
The first step is to totally dis-assemble the engine. Remove all pieces. If you are a newcomer to engine building or FE’s, a few photos as the parts are removed may prove to be useful references when you begin reassembly. This is where I started:

I started by popping out the freeze plugs and taking the block to be hot-tanked. I have yet to find a cleaning process that will remove all the grit and grime other than this procedure. Do yourself a favor and make sure you remove all the oil plugs also. Gives you that many more passages to get cleaned properly. If you aren’t sure, the FE’s have these plugs:
1-large cam plug at back of block
4-ctrsk plugs at rear of block, around large cam plug
4-freeze plug – two per side
2-block drain spigots/plugs
6-oil passage plugs (3 at rear of lifter valley, 1 inside distributor bore, 1 at front of lifter valley, 1 in timing chain area)
1 – plug at lower rear corner of block not necessary to be removed.
After the block is hot-tanked, do a quick inspection and/or magnaflux to spot any cracks. No sense investing a lot of time and money into a bad block.
Next step for me was to de-burr the block. Ford was on a production schedule when these puppies were kicked out of the nest. Very little time was spent cleaning up the blocks. You’ll find flash everywhere, oil return passages full of casting slag, and plenty of sharp corners to generate stress risers.

This is but one of the points I spent time on with my trusty die grinder. I also went at the outside of the block to clean up some of the rougher mold lines.
Something I can’t emphasize enough is to clean the motor. After it had been hot-tanked, scrubbed, shot-tumbled, I was still surprised when I put it in a big tub and went at it with little brushes. When I ran the long engine brushes thru the oil galleys, after all this, I was still bringing out gunk. And when I was all done, I tipped the tub up and found about 1/4 cup of gunk, grit, sand, rust, whatever, in the bottom.
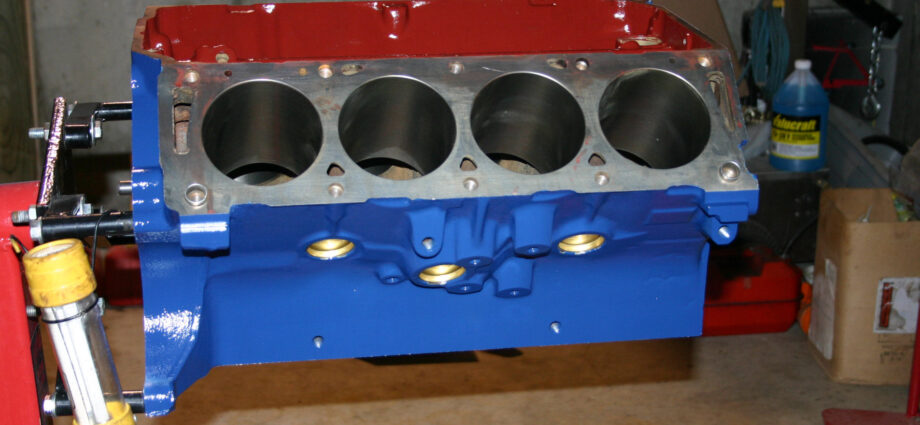
I’ve finally reached the point that I can start putting things back together – and make it look like a motor!
I’ve decided to coat the lifter valley with Glyptal to help the oil flow back to the pan. Ask about painting the inside of the motor and you’ll get about 14 different opinions. Some do, some don’t. I’ve decided to do just the upper valley and the timing chain area. I also did the back of the block, only because it looked right.
 |  |  |  |
 |  |
If you’ve never masked a motor, you’re in for a real treat. But when all done, I was very happy.