So, what’s different with the new car? A commonly asked question, HM20203 is very similar to my first car, HM1078. So why and what?

- S550 based IRS: Ford Performance discontinued the production of the T-Bird IRS
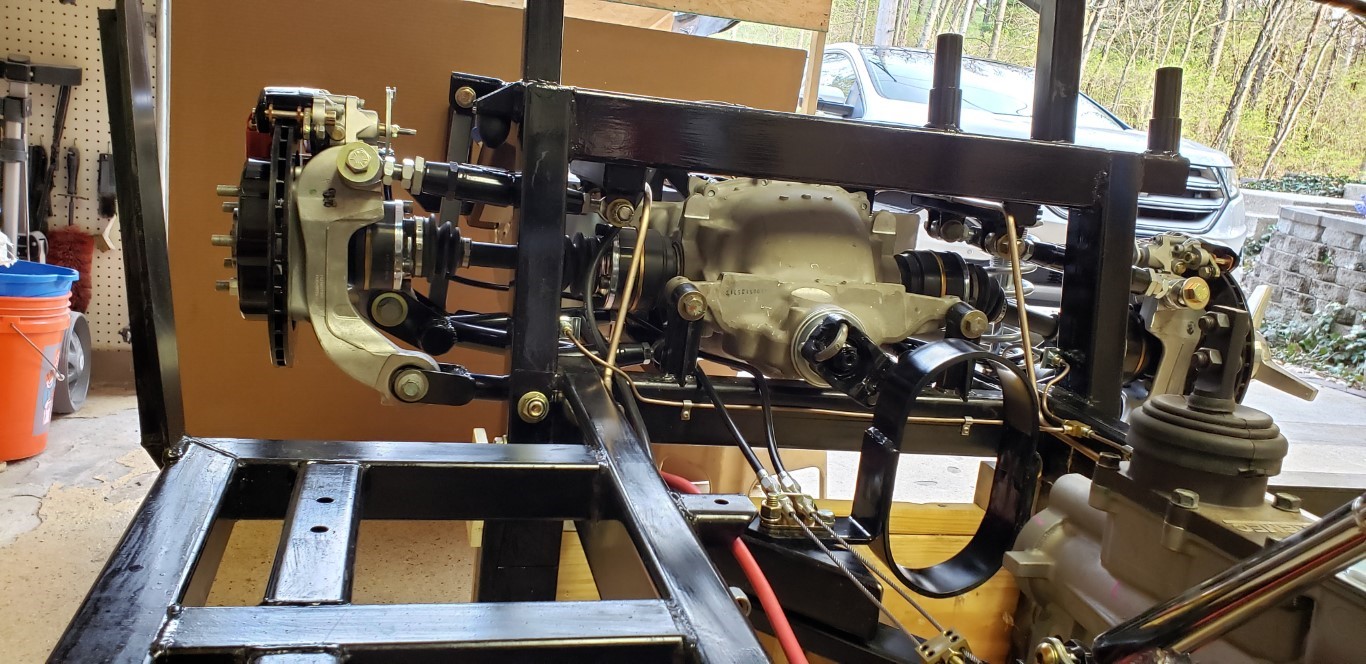 components which forced a redesign of the IRS used in most replica builds. Mine was the first build by Hurricane using this system.
 - Differential yoke: The S550 differential uses a ‘Guibo’ style driveshaft coupling which makes for a complicated connection with adapters between the driveshaft and differential. I’ve found a differential yoke that eliminates all this.
- eBrake: The older Ford-based emergency brakes were less than optimal. They worked best on a hill if you put a rock under the tire after you set the e-brake. Being period-correct with 15″ wheels, I developed a way to add a secondary set of calipers to lock the rear wheels with the eBrake lever – and it works.
- Fuel Tank: My work with the tank on the previous build converted it from plastic to aluminum tank and then tapered the tank to make it less visible from the rear. That tank was extremely heavy and only had a 12-gallon capacity. It severely limited your cruise range, especially with a big block. I developed a new aluminum tank to use the available space in the rear of the car with access to the mechanics from a hatch in the trunk. The new tank incorporates a Stealth 340 submersed pump, Centroid fuel sensor, baffling, rear edge tapered to hide it under the rear of the car, removable and provides 18-gallon capacity.
- Trunk Latch: Two changes here, concealing the latch mechanism inside the trunk lid and adding a bracket to the rear of the frame to accept a proper latch.
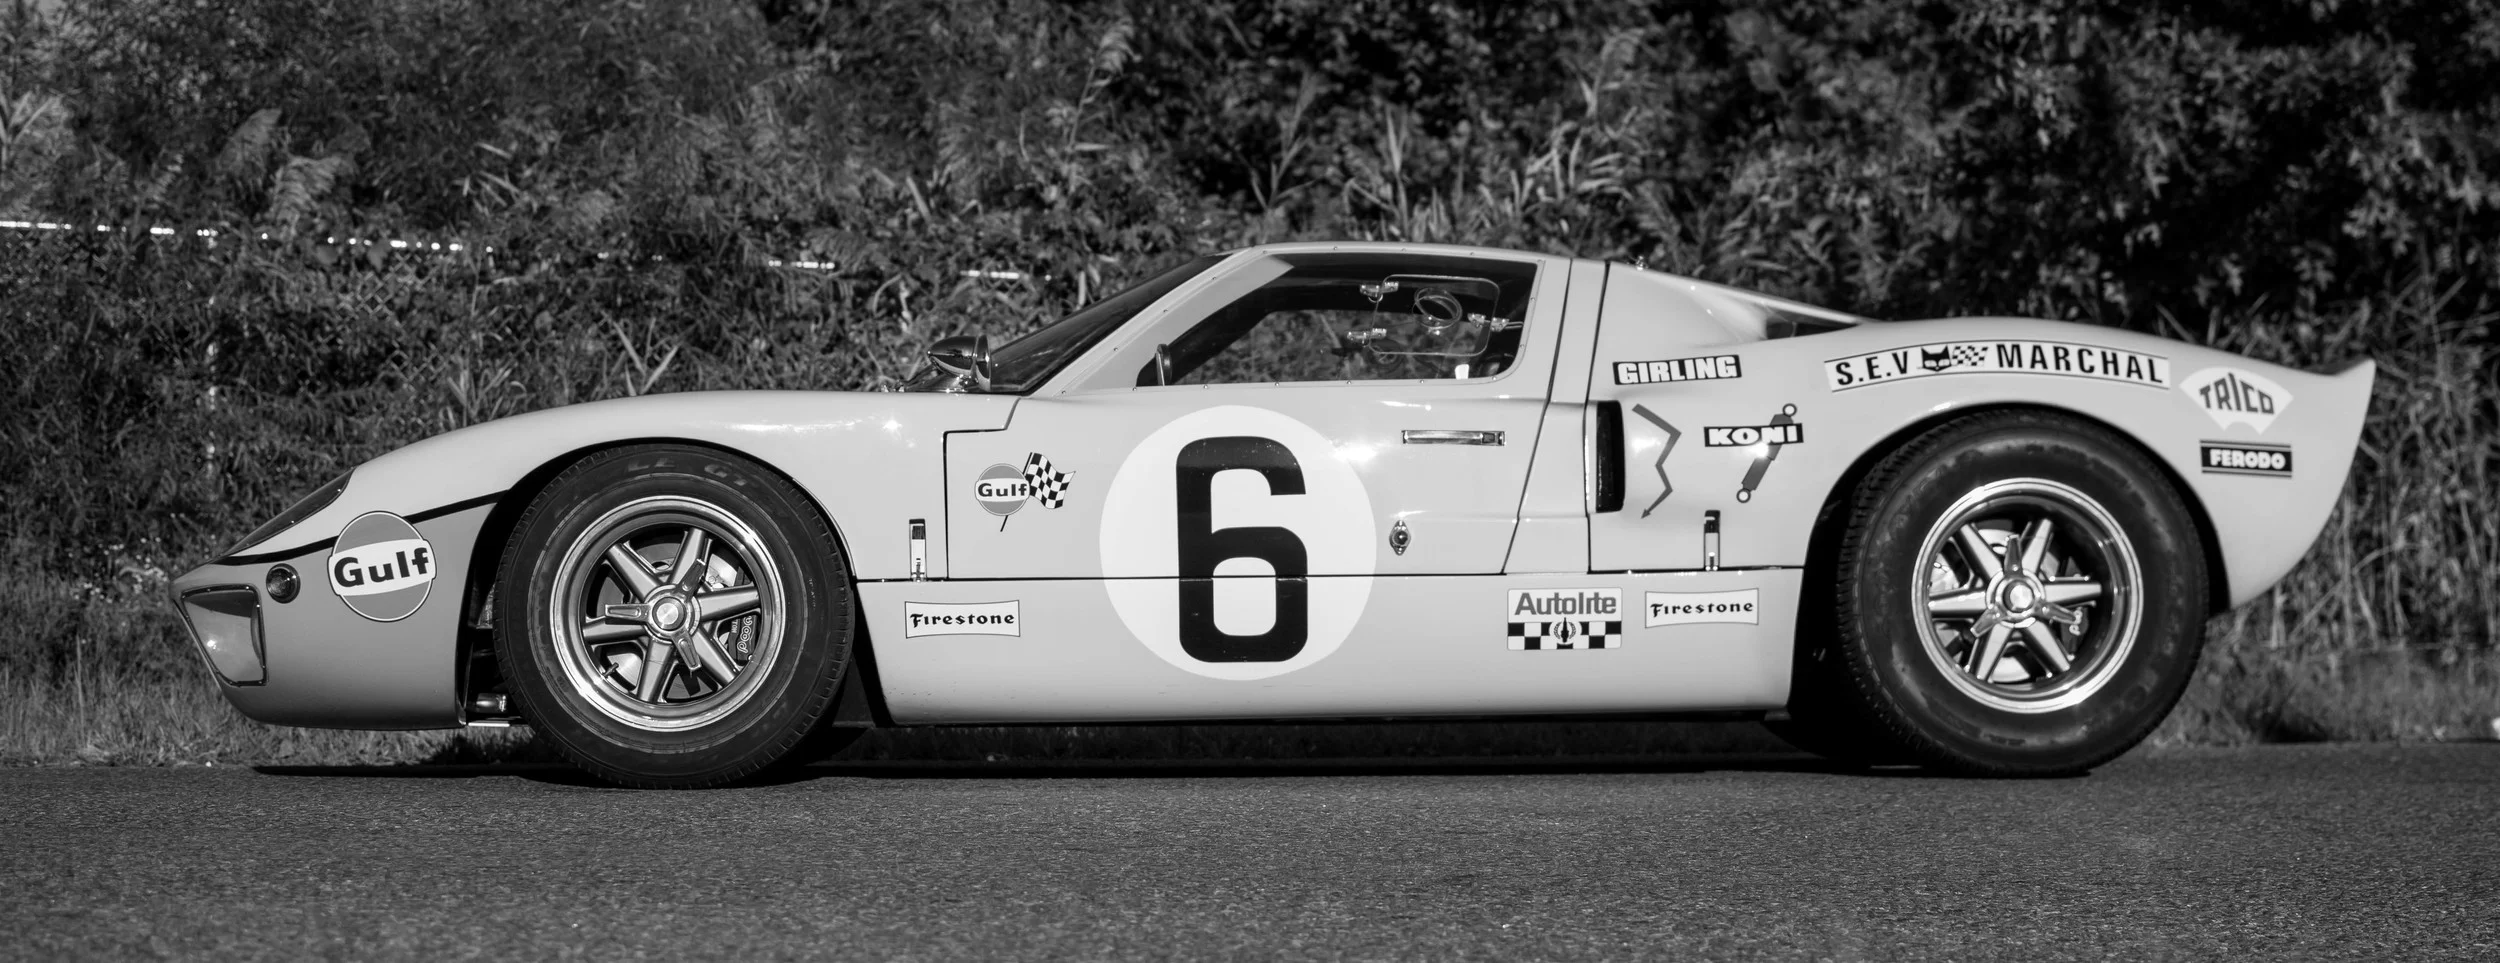
- Rear taillights: The Hurricane body was splashed off a 3200+ series original, which has a formed flat surface to accept two round taillights. Yet they supply the rectangular style lights used on the 3000-3199 series cars. I modified the shape around the taillights to match the early models and properly mount the rectangular light
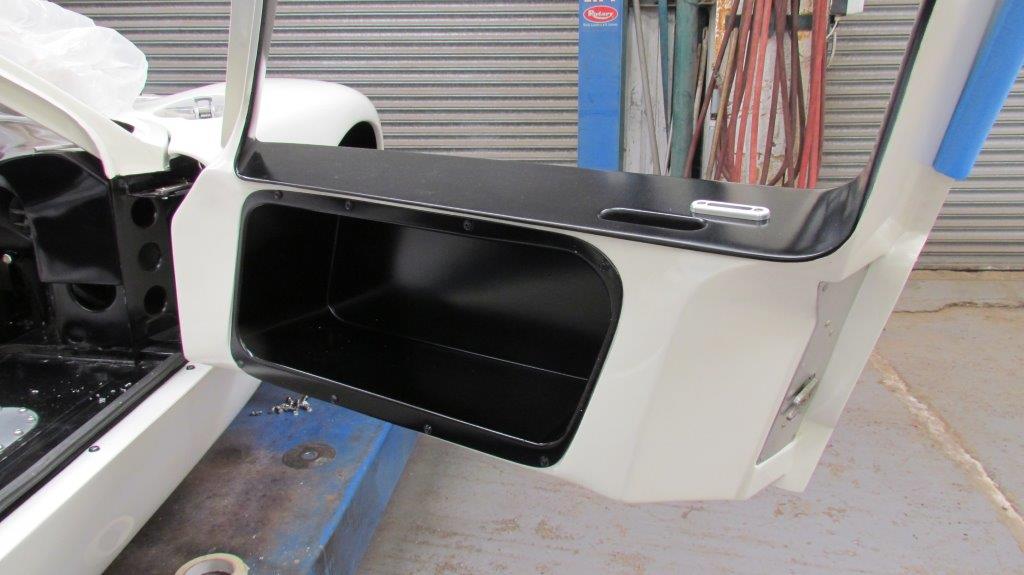
- Trunk Aluminum: The Hurricane design has a very generous trunk capacity. I chose to line all flat surfaces with sheet aluminum to make them appear more realistic.

- Tank Filler: As part of the tank redesign, I moved the filler slightly to gain more trunk space.
- Rear Battery: I’ve had luck with the smaller AGM style batteries so I incorporated a built-in retaining system, again to increase trunk capacity.
- Rollbar strut: The junction of the rollbar strut and frame was a little ‘unfinished. I built a cosmetic bracket to finish this part/area.
- Wheel Openings: The fiberglass body came with a flat flange which made the edge of the wheel opening. Original cars incorporated rolled aluminum around a piece of wire to form a reinforced, smooth edge. I reshaped the edge on all four corners to replicate this edge. How many times have you been to a car show when someone comes up and feels this edge to see if the body is fiberglass or aluminum?
- Cockpit corner/rear-wheel opening: The originals incorporate a molded corner in the cockpit to fair the sides to the rear bulkhead. The Hurricane design includes a door latch support piece in this area that sticks into the wheel well, with no finishing or fairing. I spent some time adding foam and fiberglass to make this blend in a little better.
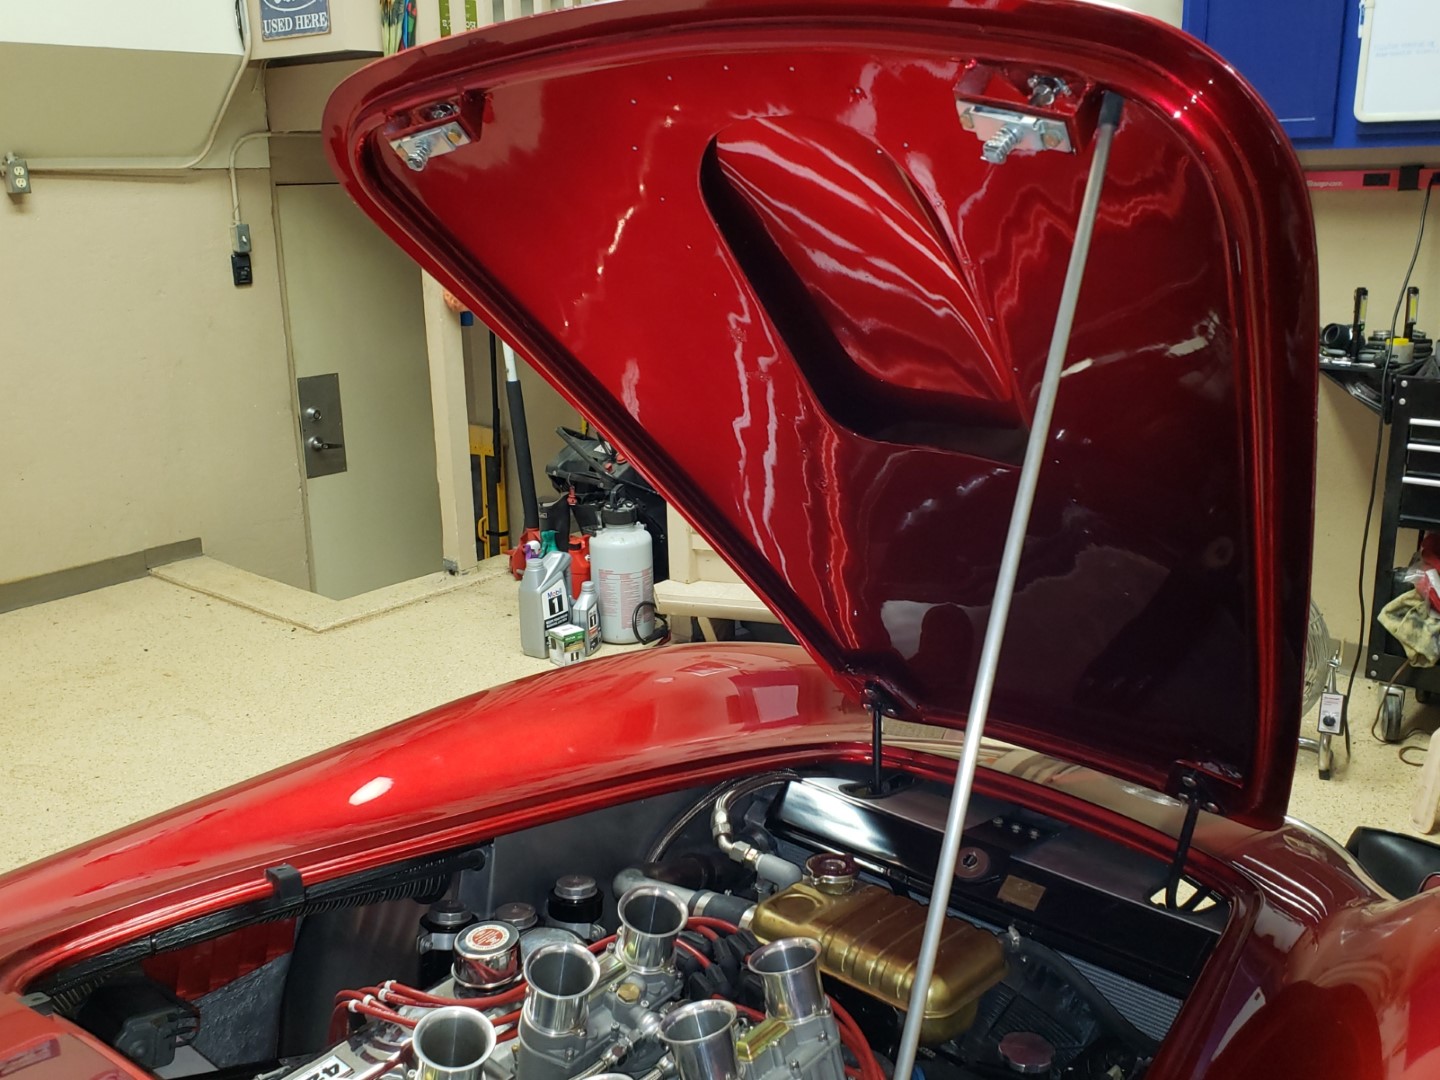 Hood frame & skin: The originals incorporate an aluminum skin over a 3/4″ tube frame. Check √ Really proud of this mod. I used the outer skin of the Hurricane hood and attached it to the frame I built. Thanks for your help, Alec. This mod allowed me to include the original style hood latches and trim plates.
Firewall: Many changes here. I began by replacing the upper area and angling it to match the original builds. Then covered in aluminum and the original electrical items added for visual accuracy.
Hood Latch: This mod incorporates the original style latch levers, handles, skin bezels and formed angle anchors welded to the birdcage.
Footbox: The GenII cars include an angled top foot box, but it is a couple inches too high which makes it difficult to install the wiper and vents, along with making it difficult to access the engine and sparkplugs. A fair amount of work but it makes a big difference. I used the original corrugated heat shield on the side of the boxes. The top is white fiberglass, again period-correct.
Birdcage tubes: The originals include a square support tube that runs from the cowl to the front upright. Adding these complicated the headers but it must be part of the package.
Slip-joint headers: Sorry, the originals didn’t have a flange plate welded to the header tubes, this was an idea that came from Factory Five (Ouch, bad word). A little more work but I prefer the original slip-joint style
Exhaust exit: The exhaust tubes exit thru an opening cut into the body side, closed on all four sides.
Heat-shield: The floor-mounted pedals put the master cylinders close to the headers and the issue of heat. I built a stainless steel heat shield between the two.
Fluid reservoirs: As on the originals, three Girling styles reservoirs with hard piping to the master cylinders.
Wiper motor: Mounted on the drivers side footbox, I found the original Lucas 3DR style motor and mounting. This connects to the RH park wipers and blades
Mechanical Linkage: Spent a little time fabricating the levers and brackets to match what ole’ Phil Remington did on the originals. I am using a Borla ITB system which requires a very accurate/positive linkage system to perform at its best.
Voltage Regulator & Solenoid: Items from the ’60s, still available today. Details, details.
Footbox Vents: Period-correct vent valves, knobs, hoses, clamps and ducting. The only deviation was to add blower fans to increase the airflow when stopped.
Overflow tank, radiator & hoses: I prefer to use a dual-pass radiator to help with the cooling. This puts the radiator inlet tube on the driver’s side, like the originals. I modified the FE overflow tank to gain more hood clearance and added the bleeder tube on the passenger side. The top of the radiator includes the formed tank and Serck labeling as the originals.
Hooters: (love that English terminology) Lucas 9H horns and bracketry.
Remote oil filter: This not only looks correct, you need to do it to get an oil filter on the big block.
Oil Cooler: The original 13row unit, modified to include a drain plug for easier oil changes and a stainless steel rub plate to protect the finish.
Pusher fans: The originals had an over-heat issue. Remington grabbed a couple Falcon fan motors and a couple HVAC blades and fabricated an impromptu cooling system. We’ve learned the puller fans work better but you need these for the correct look. They do add some cooling help but not as much as you’d think. The pullers are really efficient.
Hood and scoop riveting: A mod most do, mine is actually functional, it helps bond the skin to the tube frame.
Pin-Drive wheels: Yes, I stuck with the 15″ size.